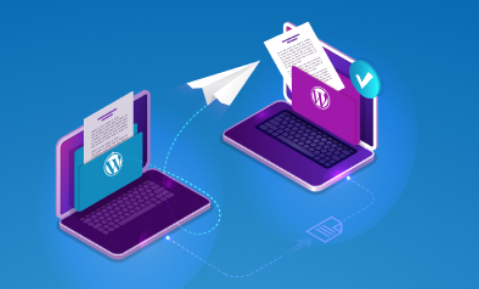
Have you ever wondered how to create a clone of your WordPress website? Whether you want to test new plugins and themes, make changes without affecting your live site, or create a backup for disaster recovery, cloning your WordPress website can be a valuable solution. In this article, we will guide you through the process of creating a clone of your WordPress website, step by step.
1. Understanding The Importance Of Cloning A WordPress Website
Cloning a WordPress website offers several advantages, including testing new features, experimenting with different configurations, and ensuring a backup for emergencies. By creating a clone, you can avoid potential downtime or errors on your live website while still being able to make changes and improvements.
2. Choosing The Right Cloning Method
There are two standard methods for cloning a WordPress website: manual cloning and using a WordPress plugin. Let’s explore both options.
2.1 Manual Cloning
Manual cloning involves duplicating your website’s files and database to a new location. While it requires technical knowledge, it offers more control over the cloning process.
2.2 Using A WordPress Plugin
Using a WordPress plugin simplifies the cloning process, making it accessible to users without advanced technical skills. Numerous plugins are available that automate the cloning process and provide user-friendly interfaces.
3. Preparing For Cloning
Before you start cloning your WordPress website, you must make the necessary preparations. These include backing up your website and setting up a development environment.
3.1 Backing Up Your Website
Creating a backup ensures that you have a copy of your website’s files and database in case anything goes wrong during the cloning process. Use a reliable backup plugin or a manual backup method to safeguard your data.
3.2 Creating A Development Environment
To clone your website, you need a development environment where you can safely make changes and test new features. This environment can be a local server on your computer or a staging server provided by your hosting provider.
4. Cloning Your WordPress Website
Now that you have made the necessary preparations, it’s time to clone your WordPress website. We will cover both manual cloning and using a WordPress plugin.
4.1 Manual Cloning Process
4.1.1 Exporting The Database
To export your website’s database, access your hosting control panel and navigate to the database management section. Locate the option to export the database and choose the appropriate format (usually SQL).
4.1.2 Copying The Website Files
Using an FTP client or your hosting control panel’s file manager, copy all the files and directories of your website to the new location. Ensure that you maintain the same directory structure.
4.1.3 Creating A New Database
In your development environment, create a new database with a unique name. Note down the database name, username, and password for future reference.
4.1.4 Importing The Database
Access your development environment’s database management section and import the database file you exported earlier. Make sure the import process completes successfully.
4.1.5 Updating The Configuration
In the new location, locate the wp-config.php file and update the database connection details to match the newly created database. Update the DB_NAME, DB_USER, DB_PASSWORD, and DB_HOST values.
4.2 Cloning With A WordPress Plugin
4.2.1 Installing & Activating The Plugin
In your WordPress dashboard, navigate to the “Plugins” section and click on “Add New.” Search for a reliable cloning plugin, install it, and activate it.
4.2.2 Creating A Backup
Access the plugin’s settings or interface, and initiate the backup process. This will create a copy of your website’s files and database.
4.2.3 Restoring The Backup To A New Location
Using the plugin’s restore or cloning feature, specify the destination where you want to clone your website. Follow the on-screen instructions to complete the cloning process.
5. Testing The Cloned Website
After successfully cloning your WordPress website, it’s essential to thoroughly test the cloned version to ensure everything functions as expected. Here are some key areas to focus on:
5.1 Verifying Functionality
Check if all the website’s functionalities, such as navigation menus, forms, and interactive elements, work correctly on the cloned website.
5.2 Checking For Broken Links Or Missing Images
Scan the cloned website for any broken links or missing images. Ensure that all the media files are properly migrated during the cloning process.
5.3 Testing Contact Forms And Interactive Features
Test all contact forms and interactive features on the cloned website to confirm that they are working correctly and sending notifications as intended.
6. Making Changes To The Cloned Website
Now that you have a cloned version of your website, you can safely make changes and experiment with different configurations. Here are some areas you might want to focus on:
6.1 Customizing Themes & Plugins
Explore different themes and plugins on the cloned website to see how they affect the design and functionality. Customize them according to your preferences and requirements.
6.2 Adding Or Modifying Content
Experiment with new content on the cloned website, such as blog posts, pages, or media files. Make any necessary modifications to ensure the content aligns with your goals.
6.3 Testing New Features And Functionality
Take advantage of the cloned website to test new features or functionalities before implementing them on your live site. This allows you to identify and fix any issues without impacting your audience.
7. Going Live With The Cloned Website
Once you are satisfied with the changes and modifications made to the cloned website, it’s time to go live. Follow these steps to ensure a seamless transition:
7.1 Updating Domain Names & URLs
If you cloned the website to a different domain or subdomain, update the domain names and URLs in the cloned website’s settings to reflect the new location.
7.2 Redirecting Traffic From The Live Site
To redirect traffic from your live website to the cloned version, you can use plugins or modify the server configuration. This ensures a smooth transition for your users.
Conclusion
Creating a clone of your WordPress website provides numerous benefits, including the ability to test changes, experiment with new features, and have a backup for emergencies. By following the outlined steps and using either the manual or plugin-based approach, you can easily create a clone and safely make modifications without affecting your live site